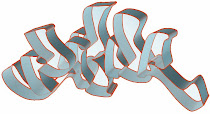
Here we will tell you how to make a Photoshop-tornpaper-effect-tutorial in photoshop.
[1] Take a new file of 500 pixels, 600 pixels, of resolution 72 dpi in the RGB mode.
[2] Take the Polygonal Lasso Tool create a shape as shown image below.
[3] Make the new layer, and fill the selection with this color coding #dbdee1
[4] Now select Drop Shadow and apply the following settings Photoshop Technique-How to use drop shadow feature.
[5] Your image will be look like this.
[6] Create a new shape with the help of Polygonal Lasso Tool.
[7] Make the new layer, and fill the selection with this color coding #adb1b3.
[8] Create a new shape with the help of Polygonal Lasso Tool.
[9] Make the new layer, and fill the selection with Black color.
[10] Then take the Brush Tool use these settings.
[11] And now Draw a line as shown image below.
[12] Draw a more line.
href="http://oogletutorials.com/wp-content/uploads/2007/12/photoshop-tornpaper-effect-tutorial12.gif">
[13] Take the Shape Tool and select this one.
[14] Create a shape and fill with this color coding #c65347.
[15] Then press Cntl+T, Transform Selection to Rotate your shape.
[16] Now go to Blending Option use the following settings.
[17] Your image will be look like this.
[18] Then take the Text Tool create your text.
[19] Now take the Eraser Tool use these settings.
[20] Select the Layer 1.
[21] Using the Eraser Tool as shown image below.
[22] Now change the Brush as shown image below.
[23] Using the Eraser Tool again as shown image below.
[24] Thanks for reading, I hope this photoshop tutorial has taught you few photoshop tricks and techniques and you can use them in your website design
project. Your final image will look like this.


0 komentar:
Posting Komentar